Deploying an Express app on FL0
In this tutorial, we're going to learn how to deploy a Node.js app on FL0 using the Express web application framework.
Prerequisites
- A Github account with admin permissions (to install the FL0 connector)
- An empty Git repo
- Node.js >= v18.0
- NPM >= v8.0
Setting up an Express app for FL0
To get started, let's set up a fresh Express app. Open up your terminal and run the following commands
mkdir fl0-express-tutorial
cd fl0-express-tutorial
Now we have an empty folder we can initialize it as an NPM package and install Express:
npm init --yes
npm pkg set type="module"
npm install express
Create a new file in the root of your folder called index.js and add the following content. Take special note of how the port variable is set.
FL0 will pass in an environment variable to your app called PORT, and it expects your app to listen on that value.
import express from "express";
const app = express();
// Important! Set the port using the PORT environment variable
const port = process.env.PORT ?? 3000;

app.get("/", (req, res) => {
  res.send("Hello World!");
});

app.listen(port, () => {
  console.log(`Example app listening on port ${port}`);
});
Test that your app is working by running this command from your terminal:
node index.js
After running the command you should see the message Example app listening on port 3000.
Open http://localhost:3000 in your browser to check that your application is working.
Commit your code to your repo to save your progress.
Create a FL0 Account
Next up, let's jump into FL0 and get ready to deploy our application.
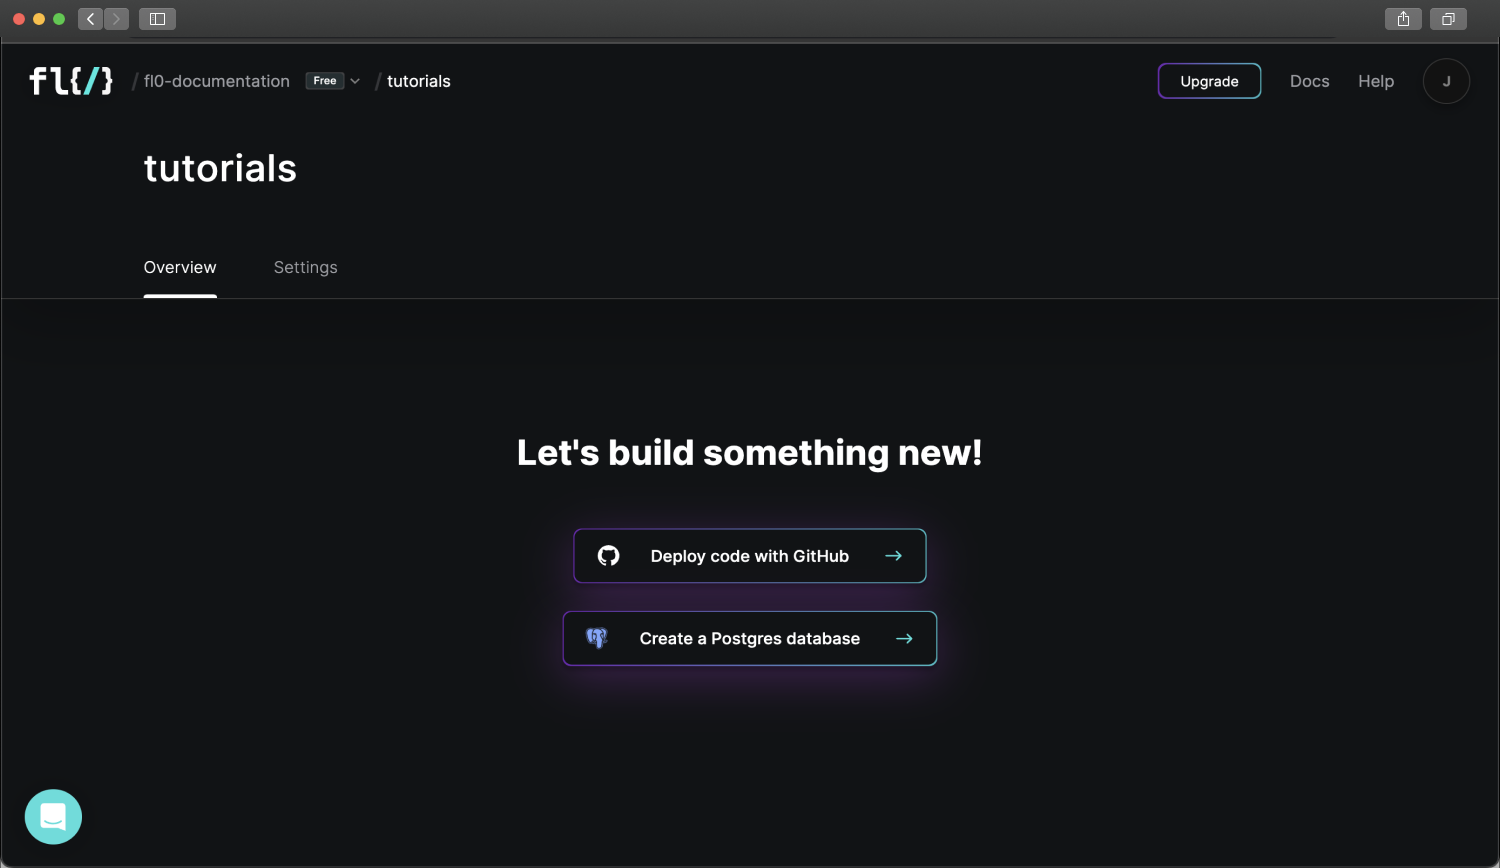
Head over to the FL0 platform, and create an account. You'll be guided through the creation of a Workspace and Project. Once complete, you should see a screen with two buttons.
- Deploy code with Github
- Create a Postgres database
Connect Github
Click on Deploy code with Github. You'll need to give Github permissions to install the FL0 Github Connector. Once connected, you'll see a list of your repositories displayed inside FL0.
A Github org can only be connected to a single FL0 workspace at a time. If you experience any issues connecting Github, see the Troubleshooting page.
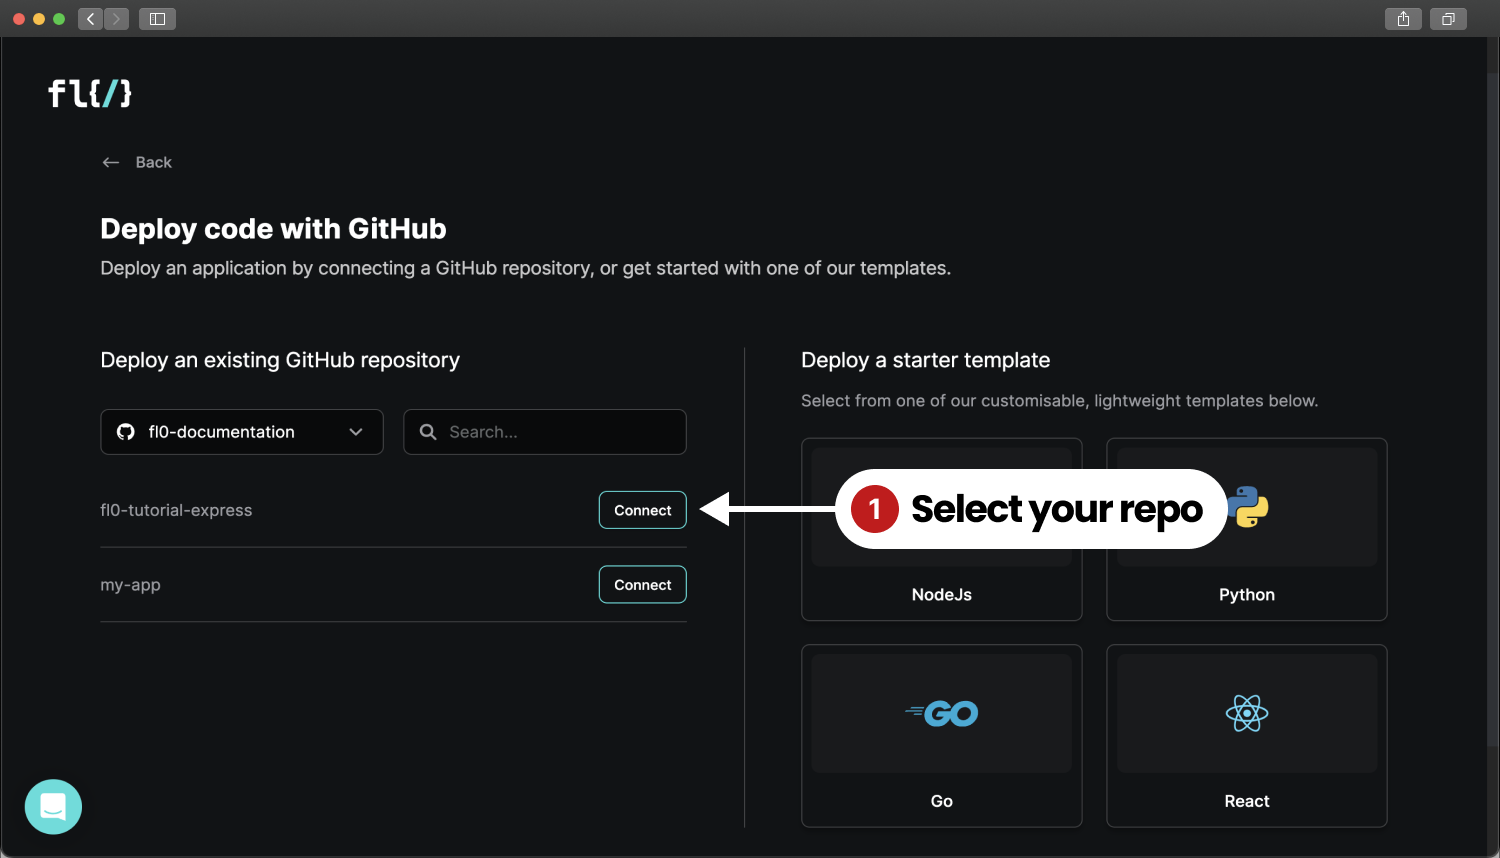
Click the Connect button next to the fl0-tutorial-express repository to continue.
Configuring & Deploying
The next screen will ask you to configure your application. We can use the default settings for now.
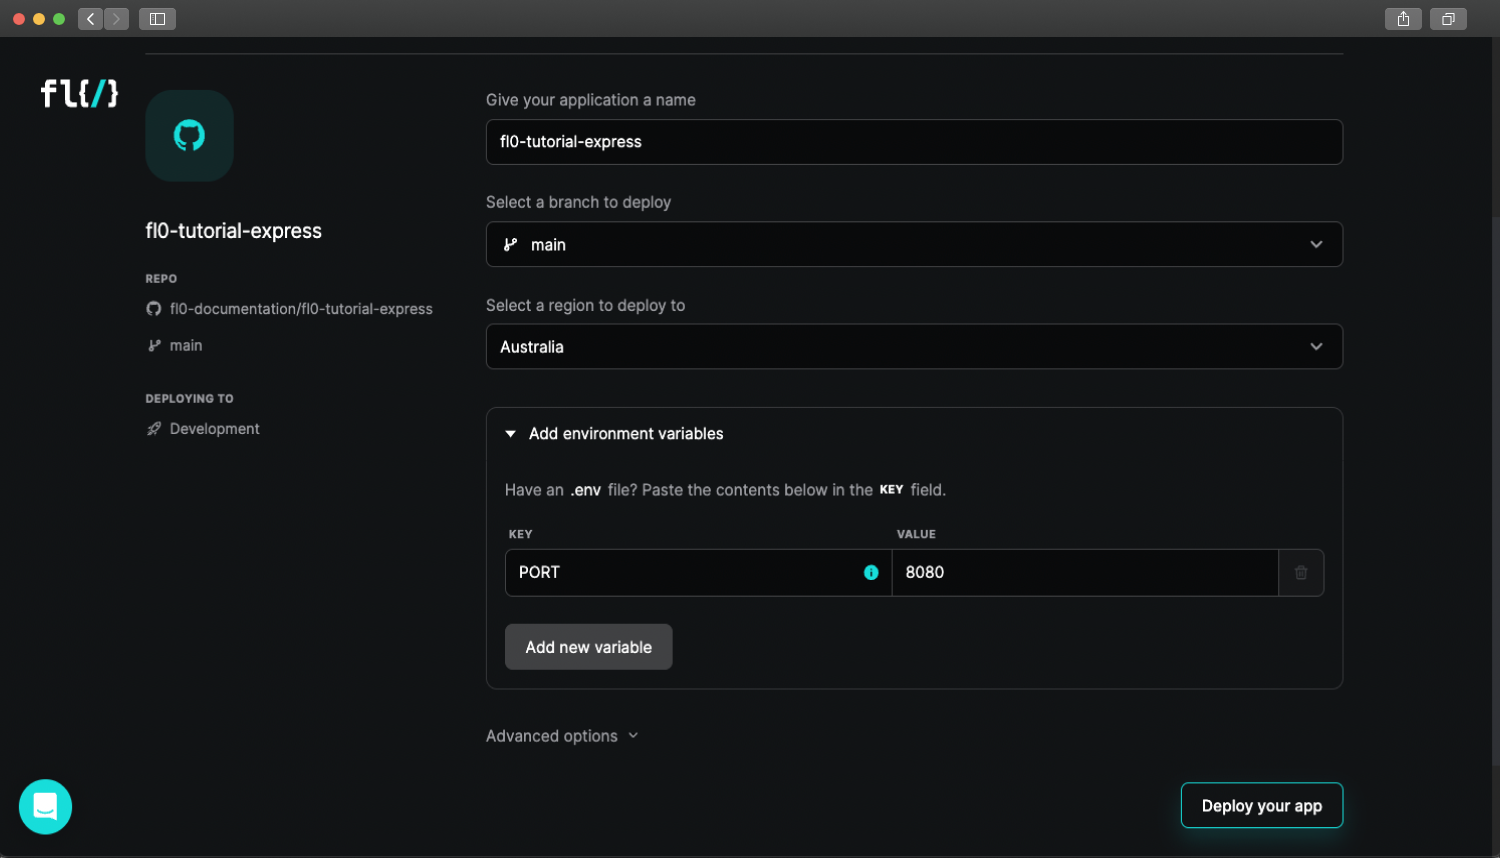
Click Deploy your app to continue. Your app will automatically start building and deploying. The process should take about 2 minutes. If everything goes well, you'll see a screen that looks like the one below. Copy the application's URL shown under the heading.
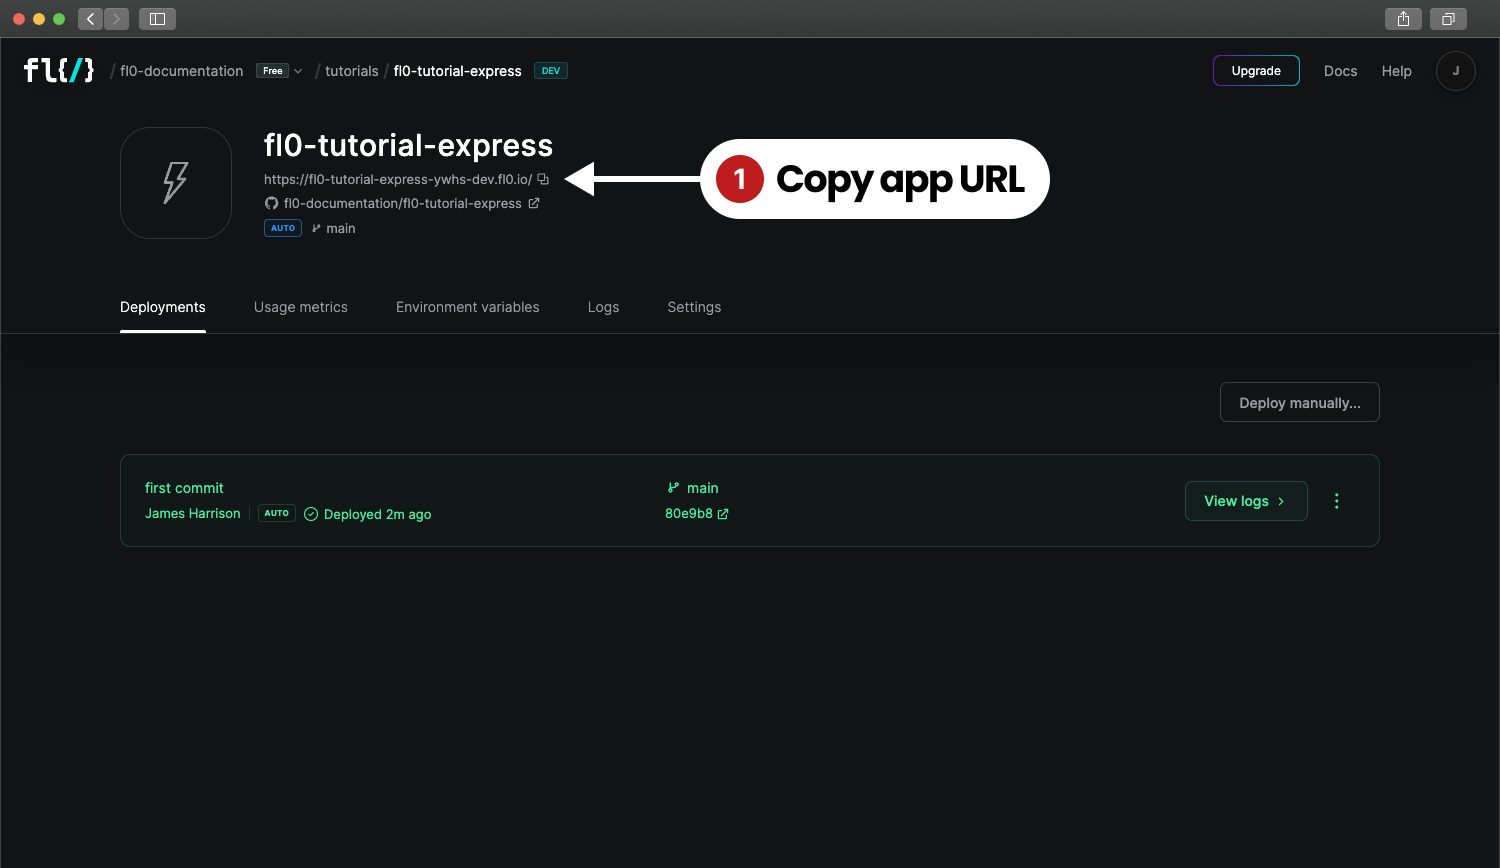
Paste the URL into your browser and you should see the familiar Hello World! message!
Connecting to a Postgres Database
If you don't have a Postgres database yet, check out the Postgres tutorial first! To connect to the database, we need a database client. There are many clients and frameworks available, like Prisma, TypeORM, Sequelize and many more. For simplicity, we're going to use the basic pg NPM package. We can install it with this command:
npm install pg
We'll need some data to play with, so create a file called db/data.sql and fill it with this SQL:
insert into contacts (first_name, last_name, email, phone) values ('Nessie', 'Aris', '[email protected]', '298-108-5883');
insert into contacts (first_name, last_name, email, phone) values ('Sullivan', 'Shoorbrooke', '[email protected]', '144-695-5915');
insert into contacts (first_name, last_name, email, phone) values ('Elyn', 'Mangam', '[email protected]', '494-744-4973');
insert into contacts (first_name, last_name, email, phone) values ('Peder', 'Gathercole', '[email protected]', '523-386-9896');
insert into contacts (first_name, last_name, email, phone) values ('Parker', 'Hails', '[email protected]', '955-771-1380');
insert into contacts (first_name, last_name, email, phone) values ('Nichole', 'Aulds', '[email protected]', '381-753-1987');
insert into contacts (first_name, last_name, email, phone) values ('Flem', 'Robbeke', '[email protected]', '158-260-4378');
insert into contacts (first_name, last_name, email, phone) values ('Shelbi', 'Guillou', '[email protected]', '480-149-9081');
insert into contacts (first_name, last_name, email, phone) values ('Gladys', 'Endrighi', '[email protected]', '584-935-9687');
insert into contacts (first_name, last_name, email, phone) values ('Donelle', 'Dunphie', '[email protected]', '312-865-0049');
Next, let's add a new file to our codebase: db/index.js. Add the following code, being sure to replace <YOUR DB URL HERE> with the URL from FL0's database.
import pg from "pg";
import fs from "fs";

const pool = new pg.Pool({
  connectionString: "<YOUR DB URL HERE>",
});

export const bootstrap = async () => {
  // Create the 'contacts' table if it doesn't exist yet
  await query(`
    create table IF NOT EXISTS contacts (
        first_name VARCHAR(50),
        last_name VARCHAR(50),
        email VARCHAR(50),
        phone VARCHAR(50)
    );`);

  // Bootstrap the 'contacts' table with sample data if it is empty
  const contacts = await query("SELECT * from contacts");
  if (!contacts.rowCount) {
    console.log("Bootstrapping database");
    const data = fs.readFileSync("db/data.sql");
    await query(data.toString("utf-8"));
  }
};

export const query = (text, params, callback) => {
  return pool.query(text, params, callback);
};
Update your index.js file to look like this:
import express from "express";
import * as db from "./db/index.js";

const app = express();
// Important! Set the port using the PORT environment variable
const port = process.env.PORT ?? 3000;

app.get("/", (req, res) => {
  res.send("Hello World!");
});

app.get("/contacts", async (req, res) => {
  const result = await db.query("SELECT * FROM contacts");
  res.send(result.rows);
});

await db.bootstrap();

app.listen(port, () => {
  console.log(`Example app listening on port ${port}`);
});
Now we have a new route, /contacts, which will return all the contacts found in our database. We also added a line to run the db.bootstrap() function when the app boots, to populate the database if it's empty.
Your folder structure should look like this:
fl0-express-tutorial
├── db
│   ├── index.js
│   └── data.sql
├── index.js
├── node_modules
├── package-lock.json
└── package.json
Run node index.js again and open http://localhost:3000/contacts in the browser. You should see your list of contacts returned as JSON! Commit your changes and push them to your Git repo to see FL0 automatically build and deploy a new version.
Using Environment Variables
What we've achieved so far is great...but we hard-coded the database URL into our code, which isn't good practice. Instead, we can use Environment Variables to store secret information like credentials. Let's get it working locally first.
Create a new file in the root of your repo called .env. Paste in the following content, replacing <YOUR DB URL HERE> with your database URL from FL0.
DATABASE_URL=<YOUR DB URL HERE>
We don't want this file added to Git, so add a line to your .gitignore file as well:
node_modules
.env
In order to read this file and load the values into our Node process, we need to use a library called dotenv.
$ npm install --save-dev dotenv
We only want to use dotenv for local development, so we'll create a new script in package.json to start a development server using dotenv.
{
  "name": "fl0-express-tutorial",
  "version": "1.0.0",
  "description": "",
  "main": "index.js",
  "scripts": {
    "start:dev": "node -r dotenv/config index.js",
    "test": "echo \"Error: no test specified\" && exit 1"
  },
  ...
}
When running on FL0, environment variables will be automatically injected without the need for the dotenv library.
Finally, update db/index.js to use the environment variable instead of the hard-coded value:
import pg from 'pg';
import fs from 'fs';

const pool = new pg.Pool({
    connectionString: process.env.DATABASE_URL
});

...
Now, you can run your app locally with this command: npm run start:dev.
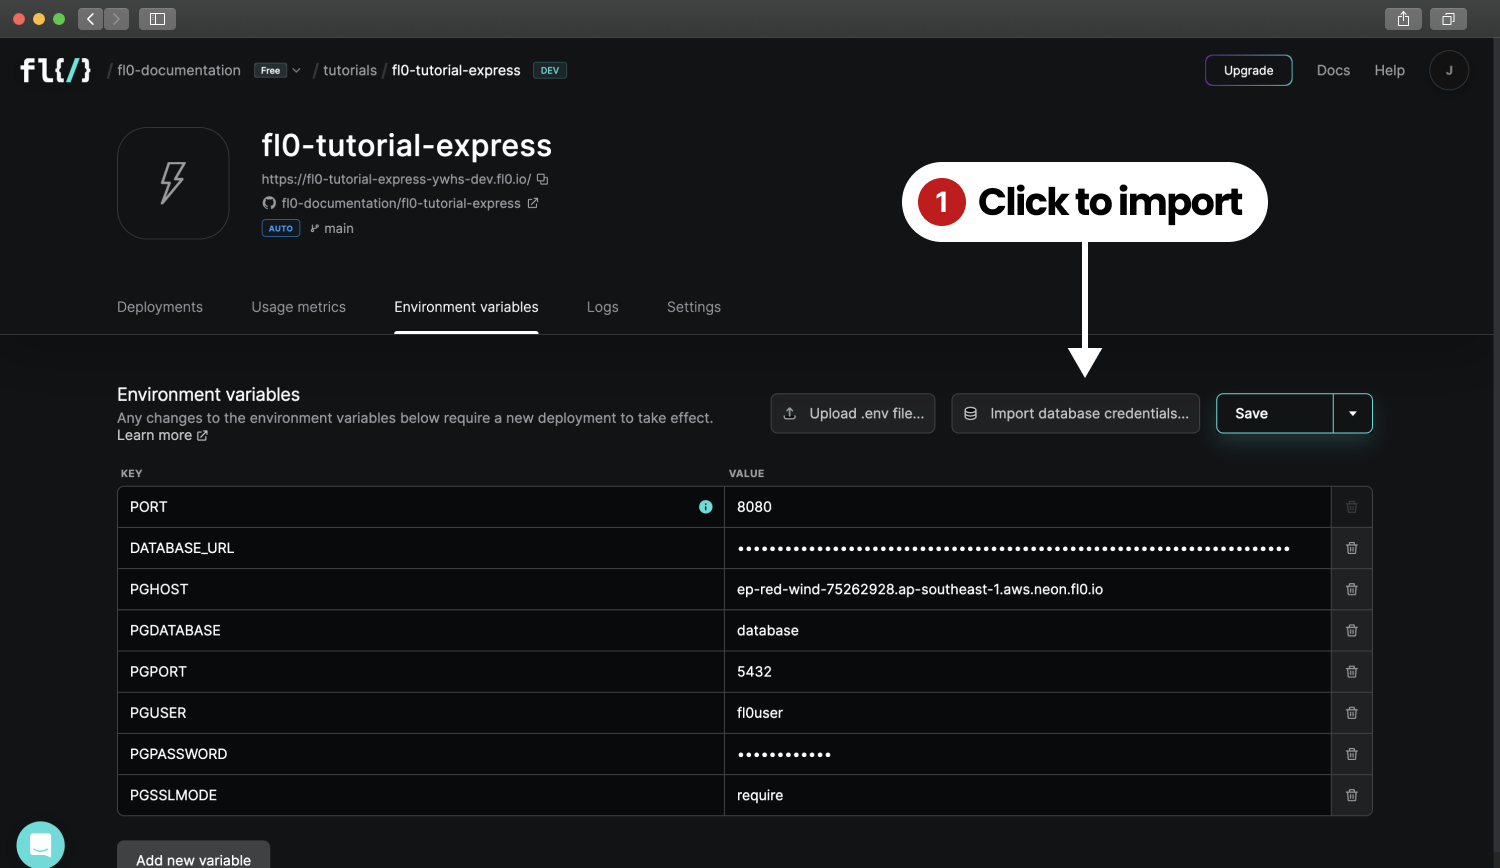
To run on FL0, the Environment Variables need to be set through the UI.
- Navigate to your Application in FL0
- Click on the Environment Variables tab
- Click the Import database credentials button and select your database
- Click the Save button
FL0 automatically adds the database credentials to your app. Commit your code and push it to your repo to run another build.